

DIY Book Nook Kit: Build a Tiny Wooden Library Scene
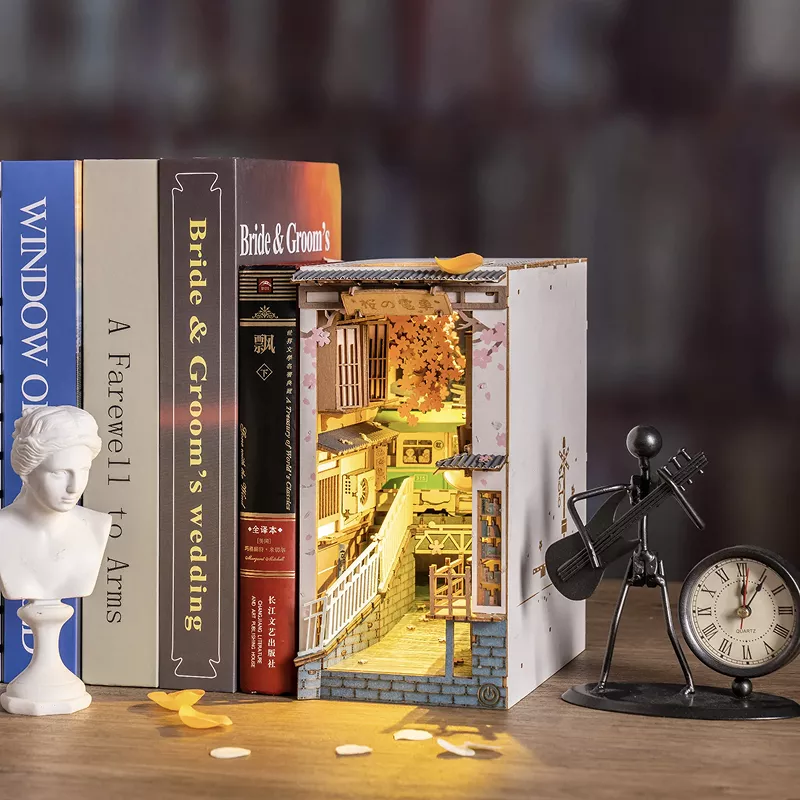
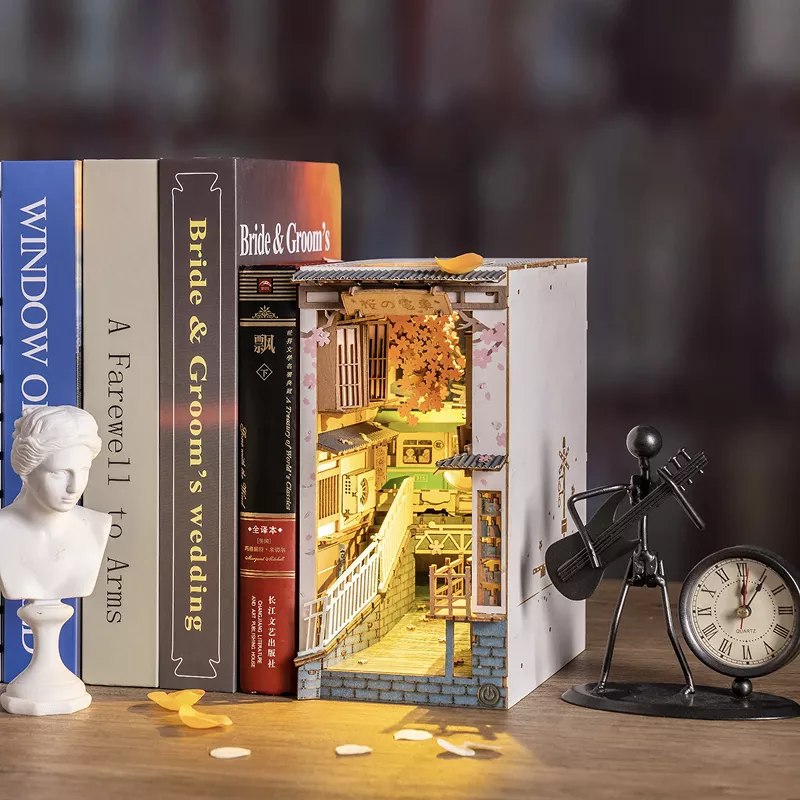
DIY Wooden Miniature House Book Nook Kit: Build a Tiny Library Scene for Your Shelf
A book nook is a miniature scene designed to sit between books, turning an ordinary shelf into a small window of story and light. This DIY wooden miniature house kit focuses on hands-on assembly, fine details, and a cozy finished display that doubles as decor and a satisfying craft project. For more guidance, see Completed CYLC 2024 Projects.
What a Book Nook Is and Why It Works on a Bookshelf
Book nooks are designed with one job: create a sense of “there’s more behind the books.” Because the scene is framed like a narrow diorama, it naturally pulls the eye inward and makes a shelf feel layered rather than flat. For further reading, see Hands Craft DIY Miniture House Book Nook.
- Creates the illusion of depth and a “hidden room” between book spines
- Adds ambient light and texture to shelving without taking much space
- Pairs well with themed shelves: fantasy, classics, cozy reading corners, and gift displays
- Provides a build experience similar to a model kit, with a display-ready result
The appeal isn’t only the display. Miniatures have a long history as craft and art objects, and the careful attention to scale is a big part of what makes book nooks feel special. For a deeper look at why tiny scenes are so captivating, see Smithsonian Magazine’s overview of miniatures.
What Comes in a DIY Wooden Miniature House Book Nook Kit
Most wooden book nook kits follow a similar structure: a pre-cut frame, layered surfaces that create perspective, themed decor pieces, and a lighting set to give the scene that “window glow” effect.
- Pre-cut wooden pieces intended for slot-and-fit assembly
- Decor elements for walls, floors, and miniature furniture-style details (varies by kit design)
- Lighting components for a warm glow effect (often LED-based in this category)
- Printed or patterned inserts to add realism (tiles, signs, books, textures)
- Instruction booklet with step-by-step sequence and part references
Quick look: common kit components and what they do
| Component | Purpose in the build | Where it matters most |
|---|---|---|
| Laser-cut wood sheets | Main structure and framing | Fit, stability, and straight edges |
| Detail parts | Adds depth and realism | Visual impact up close |
| Lighting set | Illuminates the interior scene | Nighttime display and “window” effect |
| Printed inserts | Creates textures and signage | Theme, mood, and finishing polish |
| Instruction guide | Assembly order and wiring steps | Avoiding rework and alignment issues |
Tools and Workspace Setup
A tidy, predictable workspace prevents the most common build issues: missing pieces, glue smudges, and misalignment from rushing. Since many parts are small, it helps to work like you’re assembling a model rather than a typical craft.
- A clear, well-lit surface with a tray or box lid to prevent parts from wandering
- Precision glue appropriate for wood (and clear-drying for visible areas)
- Tweezers for small pieces and a craft knife for clean edges
- Clips or rubber bands to hold assemblies while glue cures
- Optional: fine sandpaper for smoothing tight joins or slightly rough edges
- Optional: ruler or small square to keep walls and frames aligned
Keep a scrap sheet of paper nearby to test glue flow before applying it to the build, especially if the nozzle is narrow. A tiny amount of glue placed precisely usually looks cleaner and holds better than a heavy bead that squeezes out.
Build Process Overview: From Frame to Finishing Touches
Most book nook kits reward a steady pace. The goal is accuracy first, speed second—because the interior is meant to be viewed up close, and small skewed angles become obvious when the scene is lit.
- Dry-fit first: test connections before gluing to understand orientation and tolerances
- Build the base and frame: keep the structure square so later panels align cleanly
- Add walls, floors, and partitions: follow the suggested order to avoid blocked access
- Install lighting before final closure: route wires neatly and check power early
- Layer the details: miniature elements look best when placed with intentional depth
- Final assembly and cleanup: remove glue smudges, check stability, and ensure a flush exterior
How to Choose the Right Book Nook Kit
Choosing by priority
| If the priority is… | Look for… | Avoid… |
|---|---|---|
| Easier assembly | Fewer micro-parts, clear diagrams, sturdy framing | Highly layered interiors with tight clearances |
| Maximum realism | Deep perspective, varied textures, multiple light points | Flat, low-contrast scenes without shadow depth |
| Shelf compatibility | Dimensions that fit your tallest shelf section | Overly wide frames that crowd adjacent books |
| A relaxing project | Moderate part count and straightforward wiring | Complex wiring steps if electronics feel stressful |
Lighting, Power, and Display Tips
If your nook sits near valuable books, basic preservation habits help both the display and your collection. The Library of Congress guidelines for caring for books are a solid reference for minimizing light exposure and keeping shelves clean.
Common Build Mistakes and Easy Fixes
FAQ
How long does a wooden book nook kit usually take to build?
Most builds take about 4 to 12 hours depending on how detailed the interior is and how much lighting is involved. Splitting the project into a few sessions makes it easier to keep parts aligned and lets glue fully cure between steps.
Do book nook kits require special tools?
No—basic supplies like precision glue, tweezers, and a craft knife are usually enough. Optional sandpaper and small clamps can make tight joins cleaner and help keep the frame square while it dries.
How can the finished book nook be kept clean and looking new?
Keep it out of direct sunlight, dust it gently with a soft brush, and handle it from the base to avoid bending delicate details. If it has lighting, check the battery compartment occasionally so it’s ready when you want to turn it on.













Leave a comment