

55PCS Interlocking Drainage Floor Tiles: Planning Guide
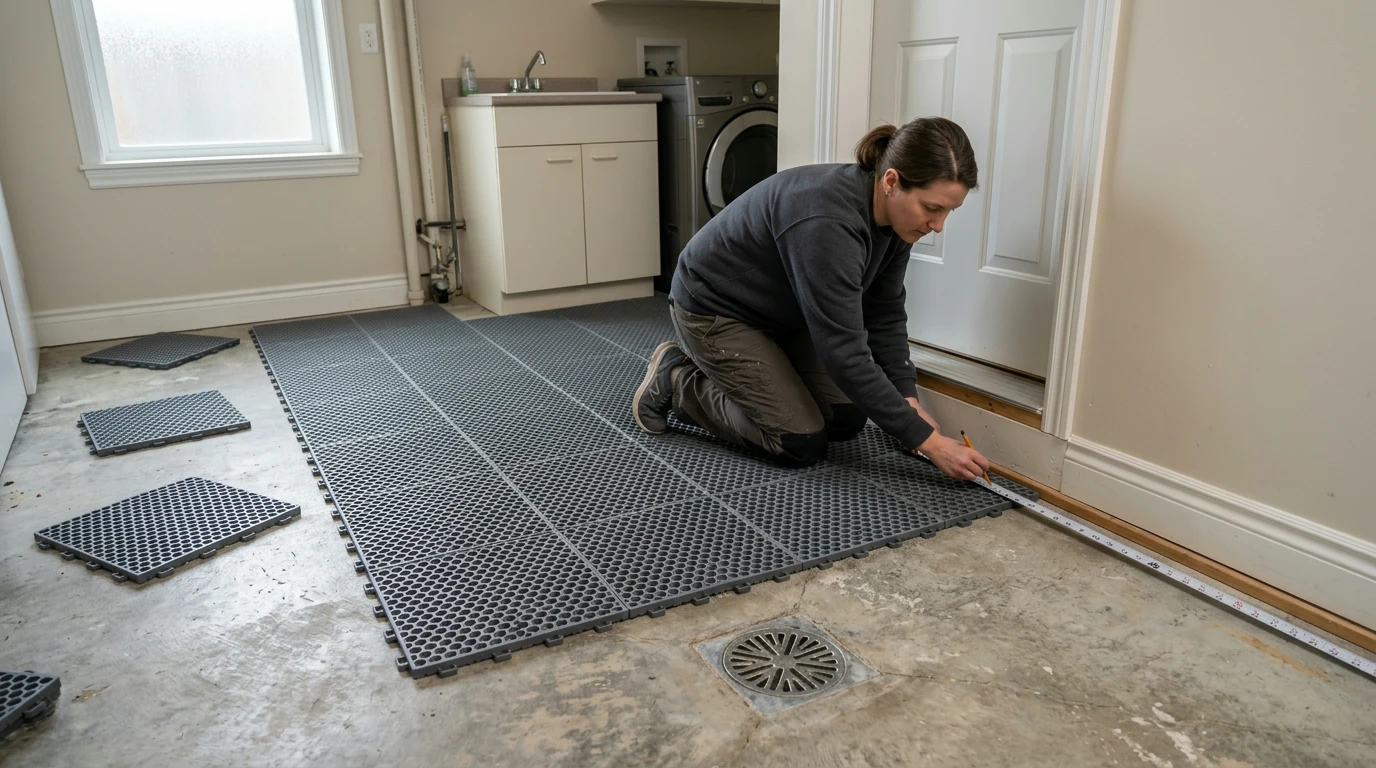
Planning a drainage tile project starts with more than choosing a set. You need to know how much floor you want to cover, where water will go, and how the tiles will fit around the edges of your space. Our 55PCS Interlocking Drainage Floor Tiles offer a connected layout in a 55-piece set, but the right quantity depends on your measurements and the product’s confirmed dimensions.
Before you order, sketch the area and take a few minutes to work through the details below. A little planning can help you avoid ordering too few sets or discovering an obstacle after you begin.
Start With Your Space
Measure the length and width of the area you want to cover, using the same unit for both measurements. For a rectangular space, multiply the two numbers to find the surface area. For example, a space measuring 8 feet by 10 feet has an area of 80 square feet.
If your measurements are in inches, multiply the length by the width and divide the result by 144 to convert square inches to square feet. Write down both the dimensions and the total area so you can use them when comparing coverage.
Not every project has a simple rectangular footprint. For an L-shaped area, divide the space into rectangles, calculate each section separately, and add the results. Note posts, fixed equipment, drains, thresholds, and other features that may affect the layout. A sketch does not have to be elaborate; it just needs to show where measurements change and where tiles may need special consideration.
Next, compare your total with the coverage stated for one 55-piece set. Tile dimensions and the way pieces connect determine the finished coverage, so avoid estimating by piece count alone. If the coverage does not divide evenly into your project area, round up to a whole number of sets and consider whether your planned layout calls for additional tiles.
| Step | What to check |
|---|---|
| Measure | Record the length and width of the area. |
| Calculate | Multiply length by width to find the area. |
| Compare | Check the coverage of one 55-piece set against the measured area. |
| Plan the edges | Account for obstacles and the intended layout before ordering. |
What to Know About the 55-Piece Set
Our featured product is a set of 55 interlocking drainage floor tiles. Interlocking tiles are designed to connect to one another as part of a floor layout. The drainage-style design is intended to let water pass through rather than simply collect on the tile surface.
That does not mean the tiles replace drainage underneath. Water still needs an appropriate path away from the area, and the base must be suitable for the intended installation. Think of the tiles as one part of the floor arrangement, not as a substitute for addressing standing water or a damaged surface.
Before ordering, visit the product page for the current price, availability, and confirmed specifications. Use the listed tile dimensions and set coverage alongside your sketch to decide whether one set is enough or whether your project requires more.
Plan the Layout Before Installation
Start with a clean, suitable base. Remove loose debris and look for conditions that could prevent the tiles from sitting as intended. Check the product instructions for any specific base requirements, and address problems with the underlying surface before placing the tiles.
Arrange the tiles first to see how the layout meets walls, posts, and other boundaries. Consider where you want to begin and how the rows will reach the opposite edge. If your project has a drain, make sure your plan does not prevent water from reaching it or block access for routine cleaning.
Follow the product’s installation instructions when connecting the pieces. Before cutting a tile or ordering separate edge pieces, confirm that those adjustments are supported for this product. If they are not, you may need to revise the covered area or leave an appropriate uncovered border rather than force a fit.
Also consider how people will move between the tiled area and adjoining flooring. The CDC’s guidance on preventing slips and falls highlights the importance of keeping walking surfaces clean and addressing hazards. Check transitions and the surrounding area as part of your plan, especially where water or debris may accumulate.
Keep the Area Clean
Inspect the tiles and surrounding floor regularly for dirt, leaves, and other debris. Buildup can interfere with drainage and make it harder to notice a problem underneath. How often you need to clean will depend on the location and how the area is used.
Follow any product-specific cleaning instructions, and check the underlying surface as needed. Pay attention to nearby drains as well: keeping the tile surface clear is only part of maintaining a path for water to leave the area.
Explore More From Our Store
Alongside home projects, our team offers everyday apparel such as our Low Waist Cargo Pants. Visit the product page for current details and availability.
FAQ
How much area will one 55-piece set cover?
Coverage depends on the dimensions of each tile. Check the product specifications and compare the stated set coverage with your measured area.
How many sets should I order?
Measure your project area and compare it with the coverage per set. Round up to a whole number of sets and account for your planned layout before ordering.
Do these tiles need a suitable surface underneath?
Yes. Check the product instructions for base requirements and make sure the location has appropriate drainage.
















Leave a comment