

Manual Wire Stripping Machine Guide: Clean Copper Fast
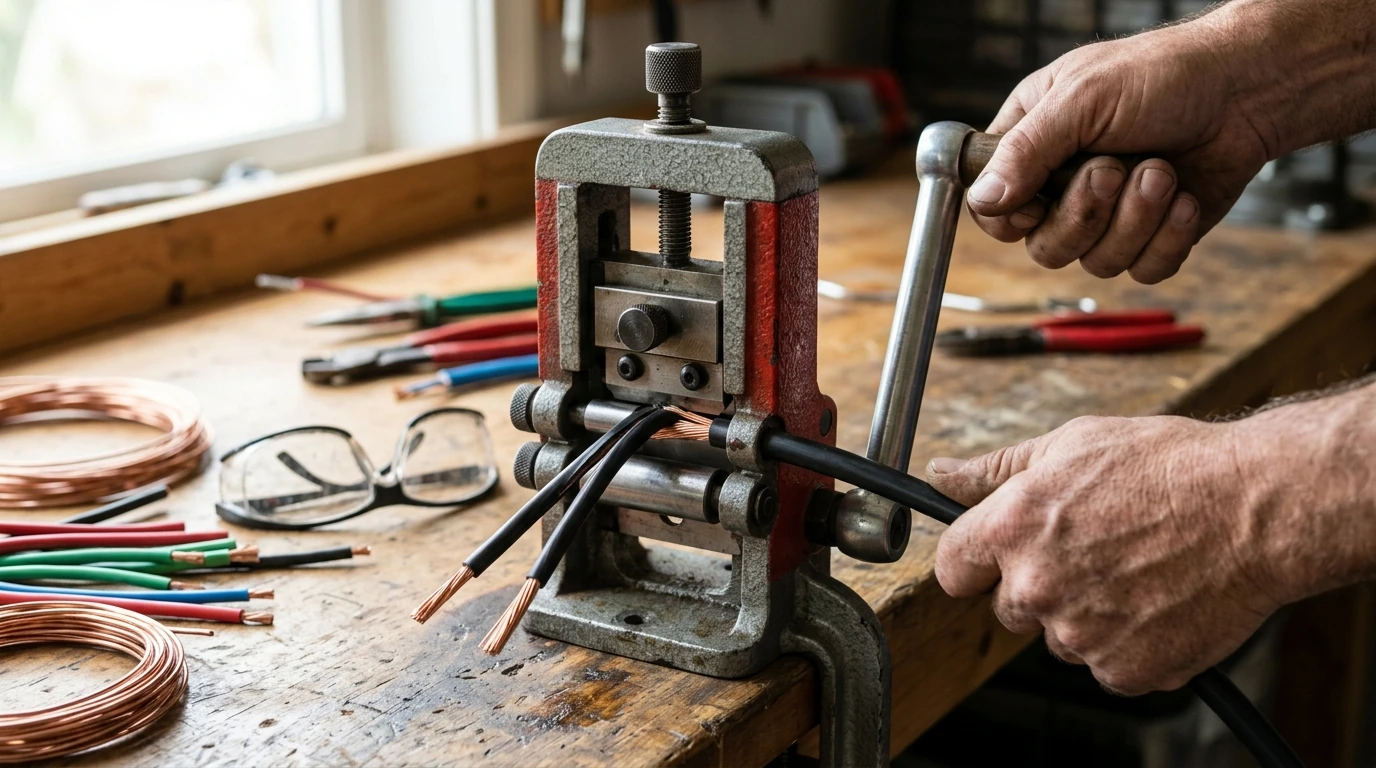
Manual Wire Stripping Machine: Clean Copper Recovery for DIY and Small-Shop Use
A manual wire stripping machine removes insulation from electrical wire with controlled pressure and a guided cutting path, helping recover clean conductors without nicking the metal. For home projects, small shops, and scrap recovery, a hand-operated unit offers simple setup, repeatable results, and portability without needing power.
What a Manual Wire Stripping Machine Does
At its core, a manual wire stripper separates insulation from copper or aluminum conductors using an adjustable blade and a guided feed channel. Instead of relying on a utility knife or handheld strippers for every cut, you feed the wire through a fixed path so the blade contacts the jacket consistently.
- Separates insulation from conductors using an adjustable blade and feed channel
- Helps produce cleaner scrap and more reusable wire for repairs or repurposing
- Reduces hand strain compared with knife stripping on longer runs
- Works best when wire is straightened and fed at a steady pace
Who It’s Best For
Manual machines shine when you want control and predictable cut depth, especially across mixed wire types. They’re also a strong fit when noise, cost, or portability matters more than maximum speed.
- DIYers cleaning up leftover cable from renovations or workshop projects
- Small repair shops processing mixed wire sizes without electricity
- Scrap-focused users who want repeatable cut depth and less conductor damage
- Mobile use where power tools aren’t convenient
Key Parts and How They Work Together
Consistent stripping comes from alignment and calibration. The feed slot keeps the wire centered, while the blade depth determines whether you get a clean split or a scored conductor. A stable frame and secure mounting reduce shifting that can cause wandering cuts.
Core components and their purpose
| Component | What it controls | Why it matters |
|---|---|---|
| Adjustable blade | Cut depth | Avoids nicked copper and improves strip quality |
| Guide channel/slot | Wire alignment | Prevents uneven cuts and torn insulation |
| Manual crank/feed | Wire speed | Improves control on tough jackets |
| Base/frame | Stability | Reduces slipping and improves safety |
| Adjustment knobs/screws | Fine-tuning | Makes it easier to handle mixed wire sizes |
What to Look For Before Buying
Not all manual strippers feel the same in day-to-day use. The best choice is usually the one that calibrates quickly and holds its settings without drifting.
- Adjustment range: Look for enough flexibility to handle the wire gauges and jacket thickness you actually see (house wire, appliance cord, shop scraps, etc.).
- Blade quality and replacements: A sharp, durable blade produces a clean slice instead of a ragged tear, and it should be easy to replace when worn.
- Ease of calibration: Simple depth adjustments save time when switching from soft PVC jackets to tougher outer sheaths.
- Mounting options: Bench mounting or clamping improves consistency and safety, especially on longer pulls.
- Frame stiffness: A rigid frame helps maintain alignment under load so your cut tracks straight.
- User comfort: A smooth crank and comfortable grip matter when stripping batch after batch.
Setup and Calibration (Fast Routine That Prevents Damage)
A few minutes of setup prevents most conductor damage. The goal is to cut the insulation—not the metal beneath it.
- Mount the machine to a sturdy surface or clamp it down to prevent shifting.
- Start with a shallow blade depth and test on a short offcut of the same wire type.
- Increase depth in small increments until the jacket splits cleanly without visible scoring on the conductor.
- For multi-strand wire, aim for a cut that opens the insulation without shaving strands.
- Keep wire straight: bends can cause wandering cuts or uneven stripping.
- If the jacket is tough or sticky, reduce feed speed and re-check depth.
Using It Efficiently on Common Wire Types
Efficiency comes from matching technique to the jacket and conductor. When in doubt, slow down and test—especially with unknown scrap.
Safety and Maintenance
- Wear eye protection and keep hands clear of the blade path during feeding.
- Avoid loose sleeves or gloves that can catch in moving parts while cranking.
- Do not strip energized wire; verify power is off and follow recognized electrical safety guidance such as OSHA electrical safety resources and NFPA 70E.
- Clean debris regularly: insulation fragments can affect alignment and cut consistency.
- Inspect blade sharpness: dull blades require more force and can tear insulation.
- Apply light lubrication to moving joints as appropriate for your model.
Manual vs. Electric Stripping Options
A Practical Option Available Now
For controlled insulation removal and small-shop convenience, the Manual Wire Stripping Machine is a hand-operated choice designed for repeatable adjustments and steady feed control. Keeping a few labeled test offcuts nearby (thin PVC, thick jacket, multi-strand) makes it faster to dial in depth when switching wire types.
If you’re setting up a compact workspace, comfortable shop-ready wear can also make longer sorting and stripping sessions easier. Options currently available include Low Waist Cargo Pants for extra pocket space and an autumn-womens-coat layer for cooler garages or outdoor sorting.
FAQ
What wire sizes can a manual wire stripping machine handle?
Capacity depends on the machine’s adjustment range and the sizes of its feed channels. Check the specs for the wire gauges you use most, and test typical samples—thicker or tougher jackets may require a slower feed and more careful depth settings.
How do you set the blade depth without damaging the copper?
Start shallow, run a short test piece, and increase the blade depth in small increments until the insulation splits cleanly. Stop and back off if you see scoring on solid wire or shaved strands on multi-strand cable, and re-check settings whenever the wire type changes.
Why is my insulation tearing instead of cutting cleanly?
Common causes include a dull blade, an incorrect depth setting, bent wire, feeding too fast, or a sticky/brittle jacket. Clean out debris, straighten the wire, slow the crank, and replace or sharpen the blade if the cut still looks ragged.















Leave a comment