

Portable Spray Shelter: Cleaner Furniture & Craft Paint Jobs
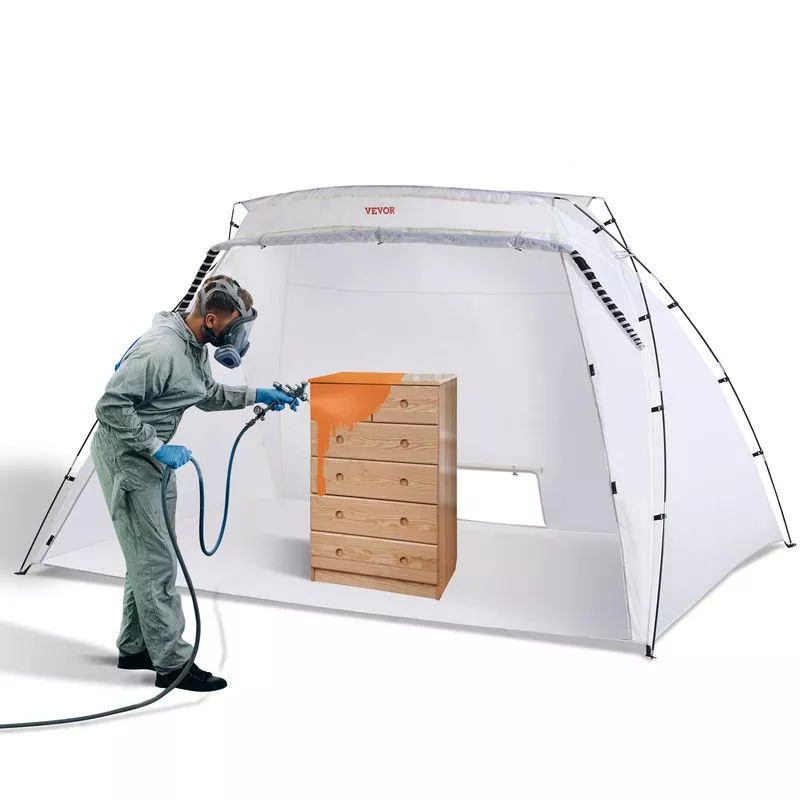
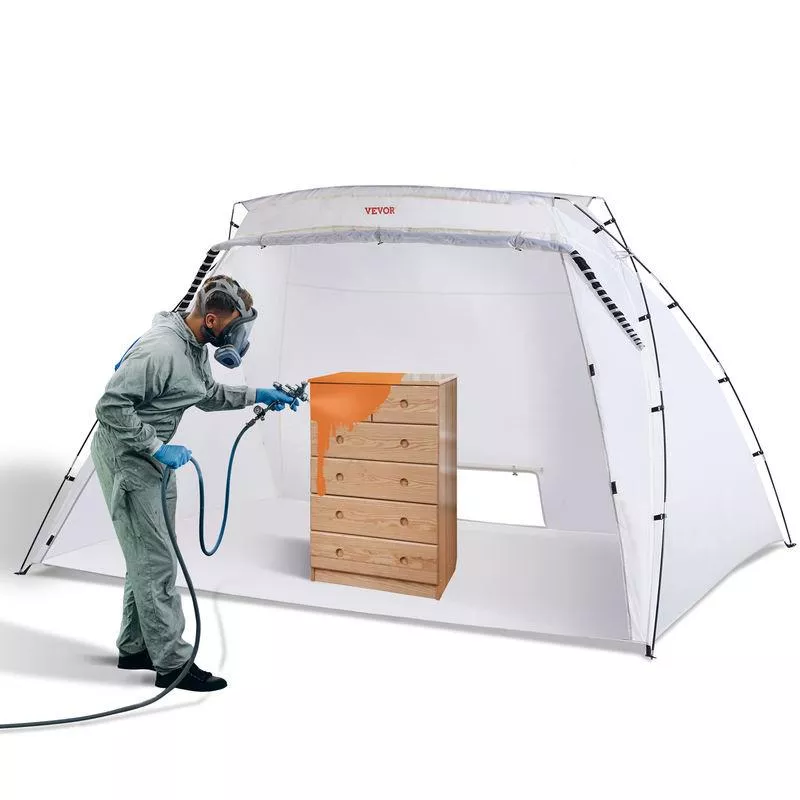
Spray Shelter for Furniture & Craft Projects: Cleaner Coats, Less Overspray, Easier Setup
A spray shelter creates a dedicated, portable workspace for painting furniture and crafts without turning the garage, patio, or driveway into an overspray zone. It helps keep dust off fresh coats, contains drifting paint, and makes it easier to get consistent results on pieces like chairs, cabinet doors, frames, planters, and small décor—especially when working in tighter spaces or unpredictable outdoor conditions.
What a Spray Shelter Does (and What It Doesn’t)
- Creates a defined spraying area to help limit overspray on nearby walls, floors, tools, and vehicles.
- Acts as a partial barrier against light dust, leaves, and debris landing on wet paint.
- Improves workflow by keeping your turntable, drop cloth, and parts staged in one spot.
- Does not replace proper ventilation—spray paints and finishes can still produce harmful vapors.
- Does not make a hazardous finish “safe” to use indoors; always follow the coating label and safety guidance.
Best Projects for a Portable Spray Shelter
- Furniture refreshes: nightstands, side tables, stools, chairs, and small dressers.
- Cabinet and trim work: doors, drawer fronts, baseboards, and shelving parts.
- Craft builds: wood signs, small bins, picture frames, holiday décor, and prototypes.
- Multi-coat finishing: primer + color + clear coat when consistent staging reduces mistakes.
- Batch spraying: repeating parts (legs, spindles, knobs) where consistent spacing matters.
Key Features to Look For
- Size and access: Choose enough clearance to spray edges and rotate the piece without bumping walls.
- Stability: A frame and panels that won’t collapse or flap into wet paint in a light breeze.
- Open-front design: Easy in/out access for larger furniture while keeping side containment.
- Material and cleanability: Wipeable surfaces help remove dried overspray and keep light reflecting evenly.
- Portability: Fold/pack design for quick setup and storage in a closet, shed, or garage shelf.
- Floor protection strategy: Use a drop cloth, kraft paper, or disposable plastic to catch drips and dust.
Setup Guide for Smoother, Cleaner Coats
- Choose placement: Pick a flat surface with enough clearance around the opening for comfortable movement and full passes along edges.
- Control airflow: Avoid strong cross-breezes that can push overspray out the opening or cause dry-spray texture. If you’re outside, angle the opening away from the wind.
- Add floor coverage: Extend paper or plastic beyond the shelter opening to catch walk-off overspray and shoe-tracked dust.
- Elevate the work: Sawhorses, painter’s pyramids, or small blocks help you reach edges and reduce sticking where the piece contacts the surface.
- Lighting: Bright, even light helps spot thin areas, runs, and dry patches before they set.
- Test spray: Do a quick pass on scrap cardboard/wood to confirm pattern, distance, and pressure before you commit to the piece.
- Spray technique: Keep a consistent distance and use overlapping passes for even coverage and fewer stripes.
- Drying plan: If dust or debris is a concern, keep the piece inside the shelter until it’s tack-free—then move it to a safer cure area.
Troubleshooting: Common Finish Problems and Fixes
Safety and Ventilation Basics
- Follow the coating label for approved use location (indoor/outdoor) and ventilation requirements.
- Wear appropriate respiratory protection for the paint/finish type; some products require specific cartridges. Review guidance from OSHA’s Respiratory Protection Standard (29 CFR 1910.134).
- Protect skin and eyes with gloves and safety glasses to reduce exposure and prevent accidental splashes.
- Keep ignition sources away—many sprays are flammable. Avoid pilot lights, sparks, and smoking nearby.
- Mind pets and children: set a boundary around the work area and store coatings securely.
- Dispose responsibly and understand VOC considerations; see the EPA’s overview of VOCs and consult workplace safety controls from NIOSH.
Quick Comparison: Painting Without vs. With a Spray Shelter
| Factor | Open Area Only | With a Spray Shelter |
|---|---|---|
| Overspray control | Drifts onto nearby surfaces; requires more masking | More contained; easier cleanup |
| Dust and debris on wet paint | Higher risk outdoors/garages | Reduced side exposure; fewer contaminants landing |
| Workflow | Tools and parts spread out; frequent repositioning | Defined zone for staging parts and coats |
| Consistency of coats | Harder to maintain distance/angles around clutter | More predictable positioning and access |
| Cleanup time | More sweeping/wiping and masking removal | Less surface contamination; focused floor protection |
Recommended Option for Furniture and Craft Spraying
A portable spray shelter can simplify prep, protect the surrounding area, and improve finish consistency for furniture and craft projects. For small-to-medium pieces, batch spraying multiple parts, and situations where keeping paint mist contained matters, consider the Spray Shelter for Furniture & Craft Projects for quick setup and easy storage.
For outdoor sessions or garage work where temperatures swing, comfortable project gear can make a long finishing day easier—like Low Waist Cargo Pants for movement and pockets, or an autumn-womens-coat for cooler, breezier conditions.
FAQ
Can a spray shelter be used indoors?
Only if the coating label permits indoor use and you can provide adequate ventilation; a shelter doesn’t remove fumes. Follow the product instructions and wear the right respirator for the coating being sprayed.
How do you keep overspray from blowing out of the opening?
Face the opening away from the wind, avoid spraying in gusty conditions, and keep the project deeper inside the shelter. Extending floor paper or plastic beyond the entrance also helps capture drifting mist.
What size shelter is best for furniture painting?
Pick a shelter that leaves clearance on all sides so you can spray edges and rotate the piece without touching the walls. Measure your largest project and add extra room for your stance, your spray angle, and any stands or turntables.














Leave a comment