

Indoor Searing Grill: Viewing Window & Temp Control Guide
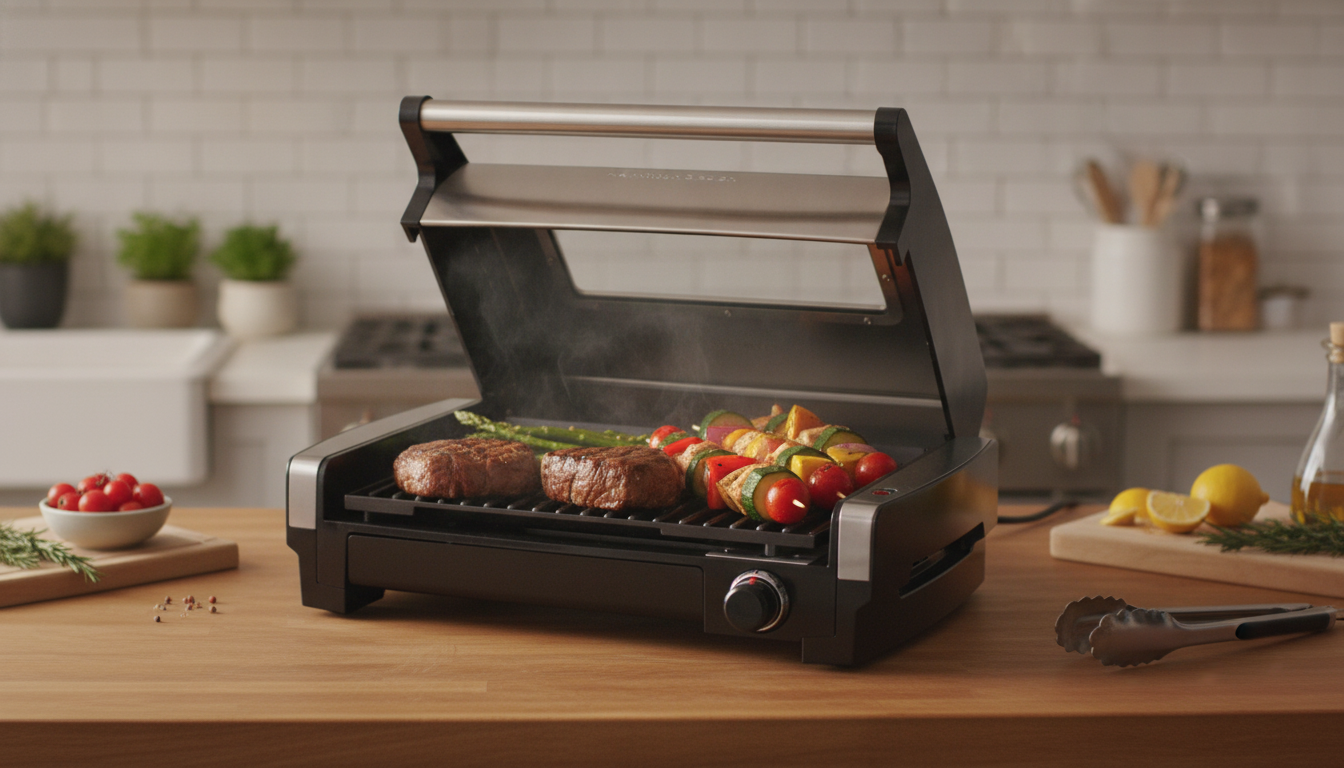
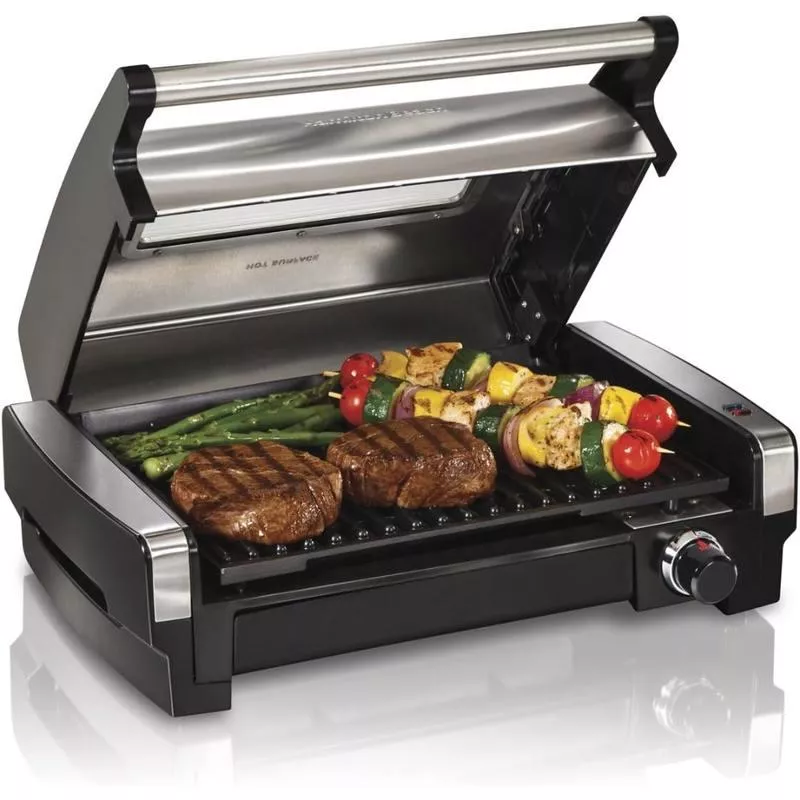
Electric Indoor Searing Grill with Viewing Window & Adjustable Temperature Control: Everyday Searing Without the Smoke
An indoor searing grill with a viewing window and adjustable temperature control makes it easier to cook steaks, burgers, chicken, vegetables, and seafood while keeping splatter and guesswork to a minimum. The viewing window helps track browning without lifting the lid, while temperature control supports everything from gentle warming to high-heat searing. The result is more consistent texture, better timing, and fewer “peek and panic” lid lifts that can drop heat right when browning should be building.
What Makes an Indoor Searing Grill Different
Indoor searing grills are built to deliver high heat on a countertop while managing the realities of indoor cooking. A fitted lid helps contain grease, reduce mess, and keep heat close to the food so it cooks more evenly. Unlike a standard grill pan, a dedicated indoor searing grill is designed to hold steady temperatures over repeated batches.
Searing capability matters because great flavor often starts with fast surface browning. When the surface temperature is high enough, proteins and natural sugars caramelize, creating deeper savory notes and a more satisfying bite. A viewing window adds real practicality: it lets you check color development and bubbling juices without opening the lid and venting heat. Paired with adjustable temperature control, the same grill can handle quick sears, slower cook-through, and gentle finishing for delicate foods.
Why the Viewing Window Matters
Opening the lid repeatedly is one of the easiest ways to lose momentum during indoor grilling. Each lift dumps heat, slows browning, and can turn a crisping surface into a steamed one. A clear viewing window helps maintain steadier cooking temperatures while improving timing—especially for foods where seconds count.
It’s particularly helpful when chasing specific visual cues: the first signs of caramelization on a steak, the moment cheese fully melts on a burger, or when a glaze starts to tighten and shine. For quick-cooking items like shrimp, thin cutlets, and sliced vegetables, being able to monitor the surface without opening the lid can be the difference between perfectly cooked and overdone.
Adjustable Temperature Control: How to Use It Well
Temperature control is what turns an indoor searing grill into an all-purpose tool. High heat is ideal for strong browning—think steaks, chops, and burgers—especially when the grill is fully preheated. Medium heat is often the sweet spot for proteins that need time to cook through without scorching on the outside, like chicken pieces or sausages. Lower heat is useful for warming, holding, or finishing more delicate items after you’ve built color.
A simple method for thicker cuts is “sear then finish”: start hot to brown the surface, then reduce the temperature so the center reaches the right doneness without burning the exterior. After cooking, allow meats to rest briefly; carryover heat continues cooking the center while juices redistribute for a juicier bite.
Quick temperature guide by food type
| Food | Suggested approach | What to watch through the window |
|---|---|---|
| Steak (1–1.5 in) | Preheat on high, sear both sides, then finish as needed | Deep browning on the surface before reducing heat |
| Burgers | High to start, then medium to finish | Clear juices and firming edges without drying out |
| Chicken breast | Medium, lid on; sear then cook through | Even color and no raw patches near thickest area |
| Fish fillets | Medium to medium-low after initial contact | Flaking and opaque color without scorching |
| Vegetables | Medium-high for char, then medium to soften | Browning on edges and tender center |
Cooking Results to Expect: Sear, Texture, and Juiciness
A strong sear depends on three fundamentals: full preheat, dry surfaces, and enough space on the grill. If the grill isn’t hot yet, food tends to stick and the surface browns slowly. If the food is wet (from marinades or condensation), the moisture steams the exterior and delays browning. And if the surface is crowded, heat drops and trapped steam softens the texture.
For thicker items, a two-stage approach is the most reliable: build color first, then lower heat and let the center come up to temperature. When dialing in timing for a new cut, an instant-read thermometer removes the guesswork. For food safety, follow established minimum internal temperatures from the USDA Food Safety and Inspection Service.
Smoke and Odor Control Tips for Indoor Grilling
Cleaning and Maintenance That Keeps Performance High
How to Choose the Right Indoor Searing Grill for Your Kitchen
Feature checklist for comparing options
| Feature | Why it matters | Good sign when shopping |
|---|---|---|
| Viewing window | Track browning without heat loss | Clear, wide window; easy-to-wipe surface |
| Adjustable temperature | Supports sear-to-finish cooking | Multiple settings; consistent heat |
| Grease management | Less smoke and easier cleanup | Drip tray and channels that guide runoff |
| Cooking surface | Determines batch size | Fits typical meals without crowding |
| Cleaning design | Affects daily usability | Removable, washable parts; nonstick-friendly care |
Best Practices for Safer, More Consistent Indoor Grilling
For nutrition-minded cooking, oil type and amount matter—using a light coating and choosing fats intentionally can support your overall approach to dietary fats (see the NIH overview on dietary fats and health).
FAQ
Does the viewing window really reduce overcooking?
Yes—checking progress through the window reduces the need to lift the lid, which helps retain heat and keeps cooking more predictable. For thicker cuts, a thermometer still provides the most reliable doneness check.
How can smoke be minimized when searing indoors?
Preheat properly, use a high-smoke-point oil sparingly, trim excess fat, and avoid sugary marinades on high heat. Cleaning residue after each session and ventilating the kitchen also makes a noticeable difference.
What foods work best on an indoor searing grill with adjustable temperature?
Steaks, burgers, chicken, fish, vegetables, and kebabs all work well, especially with a sear-then-finish approach. Use higher heat to brown, then lower heat to cook through without burning.













Leave a comment